Virtual staging: what to check before you publish the photos
Check virtual staging before you publish: compare each photo with the original and look at the home, the furniture, scale, light and labelling.
· 9 min read
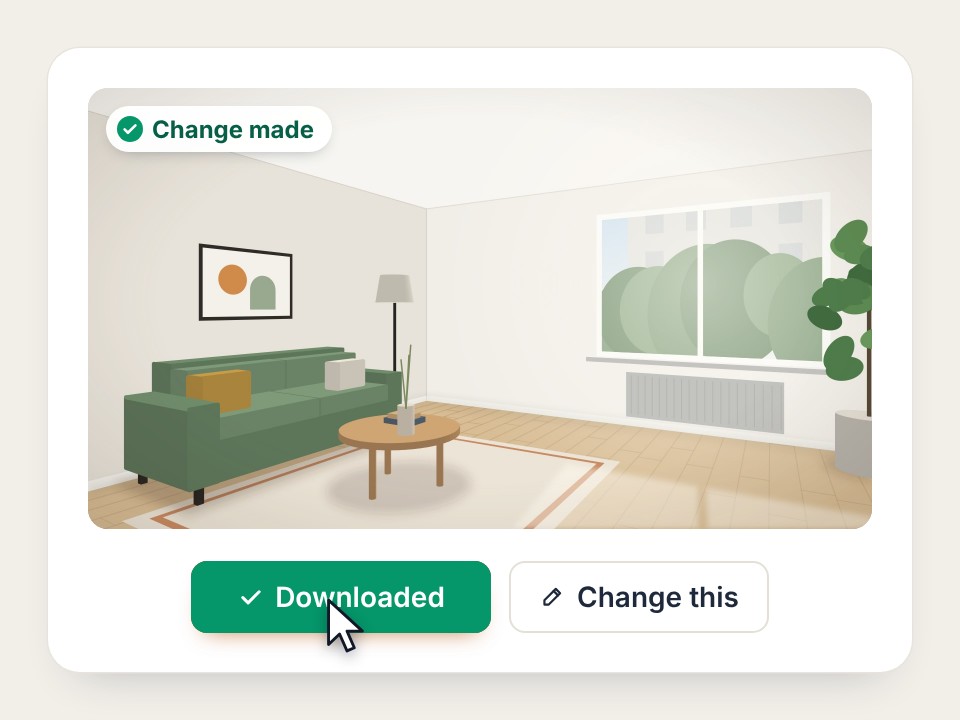
Before you publish virtual staging photos, compare every furnished photo with the original. Check that the home itself has not changed, that the furniture looks believable and fits the room, that the same space has the same furniture in every photo, and that the photos are labelled as virtually furnished. Errors show up best when you flip between the original and the furnished photo at the same size.
Virtual staging means adding furniture and decoration digitally to the photos of an empty home. This post goes through what estate agents, landlords and property managers should check before the photos go on a listing site, and why. At the end there is a checklist you can use on photos from any service.
Why check a virtually staged photo before publishing it?
A virtually staged photo needs checking because a listing photo must show the home as it is. The furniture is a suggestion of how the space could be furnished, but the walls, windows, floor and fixed fittings must be the same ones that visitors see at the viewing. If the photo shows a window the flat does not have, or a kitchen that looks newer than it is, visitors will notice at the viewing at the latest, and that costs trust in both the home and the agent.
The check is always worth doing, whichever service you use. Even a carefully made photo can have a detail you want changed before it goes live.
How do you compare the furnished photo with the original?
You compare a furnished photo with the original by opening both at the same size and flipping back and forth between them. When the photos swap in the same place on the screen, the eye catches anything other than the furniture that moves: a door frame shifts, a window frame bends or the floor changes colour. With the photos side by side, the same differences are easier to miss.
Look at the photo at full size, not as a thumbnail. Thin lines such as skirting boards, frames and the fins of radiators reveal distortion best, and they only show when you zoom in.
Stailer runs the same comparison on every photo before you see it: the furnished photo is laid over the original, and if walls, door or window frames show double, the camera has moved and the photo is made again. The furniture is also checked against the plan. Your own look before publishing still belongs to the routine, as with any listing photo.
What must never change in virtual staging?
In virtual staging, the walls, windows, doors, floors, fixed kitchen and bathroom fittings, the view outside and the camera angle must stay exactly as they are. They are part of the home, and buyers and renters base their decision on them.
Go through at least these in each photo:
- the number, size and frames of the windows
- doors and doorways: same place, same width
- the floor's material and colour
- kitchen units, worktop and appliances
- radiators, sockets and where the ceiling lights are
- the view through the windows
Stailer adds only furniture, lamps, rugs, curtains, plants, art and small decoration. Walls, windows, floors, fixed fittings, the view and the camera angle stay as they are in the photo.
How do you spot AI errors in the furniture?
AI errors in the furniture usually show in straight lines and where a piece of furniture meets the floor or a wall. Many AI tools that furnish one photo at a time typically produce these errors:
- the straight lines of window and door frames bend or ripple
- a piece of furniture looks melted, half-merged with another, or floats above the floor
- surfaces and patterns are smudged, such as the pattern of a rug or the books on a shelf
- a window, wall or floor has changed around a piece of furniture
Also check that the legs of every piece reach the floor and that shadows fall the same way as the light from the window. Make sure the sofa or bed does not block a door, a radiator or a walkway, because nobody could furnish the real room that way.
Does the furniture in the photo actually fit the room?
The furniture in a photo must be the right size for the room, or the photo gives a false idea of the space. Furniture scaled down too far makes a room look bigger than it is, and oversized furniture makes it look cramped.
A doorway is a good measuring stick: compare the height of the sofa back and the table with the height of the door. In a small studio flat, check the floor plan to see whether the bed, table and sofa really fit where the photo puts them. Small homes suit a style without oversized furniture; among Stailer's styles, Compact home is made for that.
Is the furniture the same in every photo of the same room?
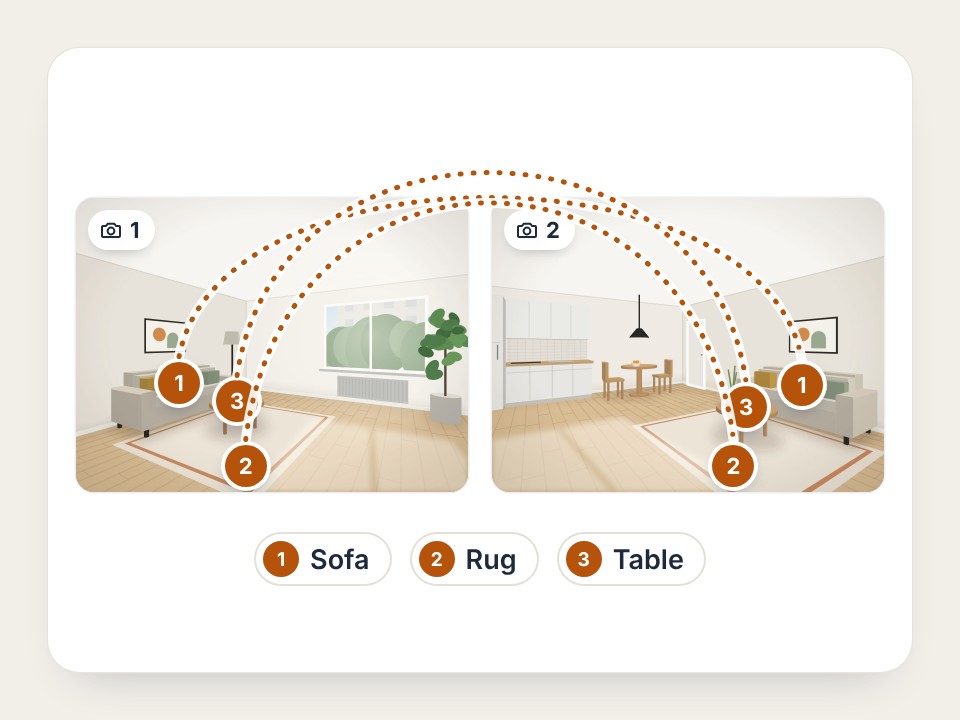
Every photo of the same room must show the same furniture in the same places, or viewers cannot read the space as one room. The difference typically shows in an open-plan living room and kitchen photographed from two directions.
An example: a one-bedroom flat has an open-plan living room and kitchen, photographed from the window side and from the kitchen end. When a service furnishes each photo separately, the first photo can get a grey corner sofa in front of the window and the second a beige two-seater against the wall. Each photo looks fine on its own, but together they do not match. So in every pair of photos, check the sofa's shape and colour, where the rug lies and how many chairs stand at the dining table.
Stailer reads the floor plan and all the photos, plans each room's furniture once and furnishes every chosen photo from that one plan. The first furnished photo of a space is the reference for the others. Without a floor plan, matching furniture across photos of the same room is less certain, so check the photo pairs especially closely then.
Does the light match the original photo?
The light in a furnished photo must match the original: the direction of the window light, the amount of light and the time of day should not change unnoticed. If a north-facing bedroom looks sunny after staging, the photo promises more than the home delivers. Also check that the light is consistent across all the photos as they follow each other in the listing.
Stailer keeps the photo's own light unless you choose a time of day. If you do, every photo gets the same light, and at dusk and in the evening the lamps are on.
Checklist before publishing
- Compare with the original. Flip between the original and the furnished photo at the same size.
- The home is unchanged. Windows, doors, floor, fixed fittings and view are the same.
- Straight lines are straight. Frames, skirting and corners do not bend.
- The furniture is whole. No floating, melted or merged pieces.
- The scale is right. The furniture matches the doorway's height and the floor plan.
- Walkways are clear. Nothing blocks a door, a radiator or a hallway.
- Photos of the same room match. The same sofa, rug and table in the same places.
- The light is believable. Shadows and light direction match the windows, and the photos are consistent.
- The photo is full size. Not a small preview or a screenshot.
- The label is there. The photos are marked as virtually furnished, and the originals are available.
Stailer's downloads carry a small "Digitally furnished" label by default. If a text or the company logo has been added to the main photo, the clean photo always stays in the set.
What should you do if a virtually staged photo has an error?
If a virtually staged photo has an error, ask for a fix before publishing rather than putting the photo up as it is. In Stailer you mark the photo and write the change in one sentence, such as "move the sofa away from the door". Three change rounds are included in every staging.
Not everything can be fixed with a change request. Virtual staging is made for empty rooms, so things left in the room stay in the photo, and a renovation cannot be shown. A good original photo saves fixes later: read how to photograph an empty home for virtual staging.
Summary
Checking a virtually staged photo is quick when you do it the same way every time: compare with the original, check the home, the furniture, the scale, the photo pairs and the light, and label the photos. The list works on photos from any service. To see how the different ways of furnishing listing photos compare, read virtual staging compared, or try the photos for your next listing in the studio.
Frequently asked questions
Should you check the photo on a phone or a large screen?
Both. A large screen shows distorted thin lines and smudged surfaces, and a phone shows the photo the way many of the listing's visitors will see it.
Will a client's own furniture look exactly the same in the photo?
Not exactly. In Stailer you can add up to 8 pictures, such as product photos or photos of your client's own furniture, and the result follows their look closely, but it is a furnishing suggestion, not an exact copy of a product.
Can belongings be removed from photos of a lived-in home?
Stailer's cleanup, which is still experimental, removes clutter or, on the strongest setting, all the furniture, and you can say what to remove or keep. Fixed fittings, walls and windows stay, and cleanup costs half of furnishing the same photos.
Where should the original photos be available?
The simplest way is to add the original photos to the listing's gallery after the furnished ones, or to have them ready to send to anyone who asks. What matters is that a buyer or renter can see what the empty room looks like.